Overview
Printing session data allows you to keep a tangible record of your HRV (Heart Rate Variability) improvements. Whether you are printing a single session or a summary of multiple sessions, the software provides a clean, professional layout that includes your coherence ratios and achievement scores.
Step-by-Step Instructions
- Select Your Data:
- Open the Review Progress view by clicking the icon on the main screen.
- Single Session: Click on the specific session in your history.
- Multiple Sessions: * Windows: Hold Control and click individual sessions, or use Shift + Click to select a continuous range.
- Mac: Use Command + Click or Shift + Click.
- Initiate Printing:
- Go to the top File menu and choose Print.
- Quick Tip: Use the keyboard shortcuts Control + P (PC) or Command + P (Mac) to open the print dialog instantly.
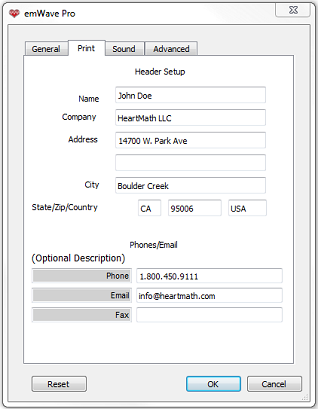
Professional Customization (emWave Pro only)
Practitioners often need to add their branding or contact information to reports.
- Go to Edit > Preferences (Windows) or emWave Pro > Preferences (Mac).
- Select the Print tab.
- Update Header: Type in the information you want to appear at the top of every printed page (e.g., clinic name, phone number, or professional credentials).
- Save: These settings are global and will apply to every user and database managed on your computer.
Important Notes for emWave2 Users
While emWave2 also supports printing, it does not allow for header customization. The software will automatically print the user information associated with the handheld device.